4

What Can you Create with Cans?

Cake Artist Ronn explores cans

So I was at home today pondering on what to write about for Fresh Friday. You know taking everyday objects that we may throw out as rubbish and recycle it into something fresh and new. Then it suddenly hit me as I was opening a can of green pigeon peas for the Pelau (Pelau pronounced: pay-la-w, is a one pot Trinidad dish) that granny was cooking, cans! they come in all shapes and sizes and usually after opening they are just discarded.

Food_Cans

Cans are very versatile when it comes to D.I.Y. craft projects. There are hundreds of different ways they can be transformed to something fresh and new. Cans can be turned to desk accessories, centerpieces,  cake stands, storage, lanterns, candle holders and even works of art that can adorn your home or even be given as gifts. That’s  naming  a few.

Today I am going to share just a few ideas with you.  All you need are a few basic supplies, empty cans and a whole lot of money, just kidding, creativity.

recycled cans_4429Vinyl Covered Recycled Cans

Here they covered the cans with a nice damask pattern vinyl.

Place them on a shelve and used them as storage for little odds and end you might have laying around the house.

(Idea from http://sewmanyways.blogspot.com/2012/08/vinyl-covered-recycled-cans.html)

iluminaria-lata-recicladaRecycled lanterns

 Handmade lanterns with cans.

 This is a great idea if you like doing out door entertaining.

 All you need is some paint, nail, hammer,and some candles.

I am  sure your guest would love them as much as you’ve enjoyed making them.

( Idea from http://restlessmindboosters.blogspot.com/2013/04/recycled-lanterns-diy-project.html )

bling_pencil_potBlinged out  stationary holder for the office.

Flat  back marbles or stones, Enamel Paint, Modge podge, Hot glue gun

Super cool and super easy. Add some bling to your office, this idea can also be used as a make up brush holder.

(Idea from http://www.creativeinchicago.com/2012/05/bling-pencil-pot-for-my-office.html )

6

Cool Candle Holders

Just follow five easy steps and turn some old cans varied sizes to a  funky, vibrant candle holder centrepiece.

This idea was actual conceptualized for a retro art-inspired look for a wedding.                                                                                                                   Black spray paint, acrylic paint in different bright colours and paint brushes.

( Idea from http://www.bellenza.com/wedding-ideas/diy-projects/turn-recycled-tin-cans-into-cool-candle-holders.html )

7Woodland Cake Stand 

These stands are D.I.Y. the cans to the bottom are coved with moss, and a few silk butterflies added to give it a special touch. If you have difficulty sourcing the wood slab, a simple circle cut MDF board trimmed off with a nice piece of ribbon can do the trick.

These stands will definitely add a nice touch of nature to your buffet. Cupcakes with some nice natural flavours like coconut, lemon, or even some cinnamon spice will just add to a nature themed party or even a wedding, they will be appealing to both your sense of sight and taste.   (Idea from http://www.diyweddingsmag.com/diy-wedding-ideas-woodland-cake-stands/ )

F8MOUT8G1ZGGSJB.LARGE_Mosaic Can Art

This is probably one of my favourites.  Instructables created this works of art. They may look very heavy,but guess what those tile are actually made of Styrofoam.  The Styrofoam was painted with a water based acrylic paint then cut on a hot wire tool.

Names, words, designs, messages, images can all be cut from the foam material and applied the same way. How great is this project, it is definitely a must try.

( Idea from http://www.instructables.com/id/Can-Art-A-Way-To-Recycle-Some-Tin-Cans/#intro )

Really hope you were inspired by these projects. Bead Cafe Arouca and Bead Craft and Hobby carry most of the materials used in these projects eg. Mod Podge, Acrylic and enamel paints, adhesives, ribbons and much more.

Always remember to keep it fresh and throw away nothing, almost anything can be recycled, up-cycled,  reused or re-purposed.

Ronn Owen

https://www.facebook.com/BeadCafeCrafts

https://www.facebook.com/beadcafett

0

Hardware Jewellery

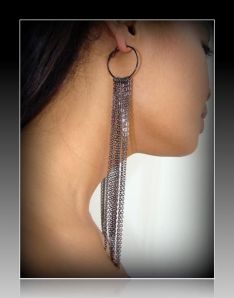
Wacky Wednesday.  Have you ever gotten all excited when you make a trip to the hardware store? I sure have.  The possibilities of what can be created with items found there are endless.  Today we are going to look at jewellery made from materials found in the hardware.   You can wear pipe fittings, washers combined with bolts and nuts, hinges even locks can be re-purposed .  Different components found can be painted or even weaved  with beads.  Hardware inspired pieces can also be store bought.
1

Hand crafted by :- Nina Stotler

hs098

Hardware inspired jewellery is great for men as well. VON KOTTWITZ The Factory Collection

2

Gold-plated chain with geometric brass and leather components. MOXHAM

006-01

 Re-purposed hitch ring chain by :-  Bond Hardware

3

Rose Gold Necklace

Made from crimp sleeve connectors and weaved with black satin ribbon by :- Stripes and Sequins 

tumblr_m6cn8eob2R1qihh0eo1_1280

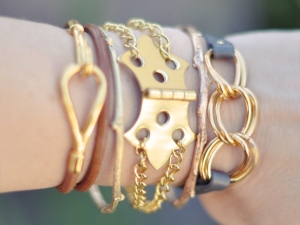
Love this DIY Hinge Bracelet by:- Love Maegan

  These are just a few of the wacky and cool ideas that can give your look a lot of edge. That tough luxe look.

Next time you go to the hardware store you will look at everything differently.

0

Creating a craft space at home

It is Tip Tuesday and today we share tips about how to create a craft space or spice up the one you have at home

Your work space can inspire and improve productivity. What we realise size does not matter but organization, seating, lighting and decor are some of the key things to creating a functional and appealing space that you and your family can enjoy.

  • Storage solutions

Some closed storage solutions are cabinets, chest of draws, storage containers, cans, jars, bags and boxes in varying sizes. You can find different types at your home store, hardware, supermarket and at Bead Cafe we have different types of storage containers. You can also recycle or repurpose furniture and containers you have at home. A good place to check is your kitchen for storage solutions you can move to your craft space. You know those sandwich bags you pack lunch or for the freezer,  they are great for sorting and storing supplies like bits and pieces of ribbon and other stringing materials. What about an old spice rack for your beads and buttons. Whenever selecting solutions remember depending on your type of craft you would need big spaces and small spaces for varying sizes of materials.

To make things easy to locate like your books, materials and tools, open shelves and hanging spaces can be helpful. Peg boards, slatwalls or grid systems can create great wall solutions and are available at your hardware store or at a retail fixtures store.You generally see these wall systems in retail stores, these systems can also be easily installed in your home craft cove. There are different attachments that suit each type. Take a look around at your supplies, even take a few pictures and jot down sizes to help make it easier when selecting things that match your needs. Install a cork board or white board to organize notes and to post inspirational pictures and calendars.

Be smart safe in your craft cove, if  you need to store dangerous chemicals, sharp or small objects and you have children at home remember safety for little hands; out of reach and protected. Ensure shelves are properly secured on walls to prevent accidents.

fff clear 136297883-450x450-0-0_sterilite+sterilite+5+drawer+clear+view+storage+un

  • Where to sit and work

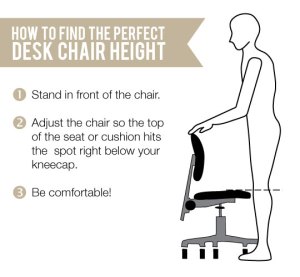
Comfort, ergonomics and adequate space are three things to consider. Choose tables and chairs that suit these needs. You can choose between folding or fixed tables and chairs, as well as furniture with casters. You can check out office furniture or home furniture stores for different options or customized designs. Seek advice about good ergonomics when selecting the right height desk and seating for good body posture. Remember to keep on crafting you must stay healthy.

112712_deskchairtip

  • Lighting

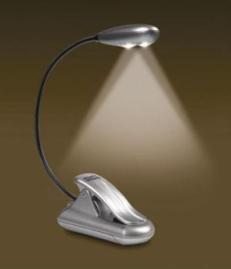
Sometimes we neglect lighting but lighting sets the mood, affects colour and ability to see projects details effectively. A magnifier is also useful if you work with small embelishments, beads and findings. There are magnifier and desk light combinations available that you can consider.

mb_2led

  • Decor, layout and design

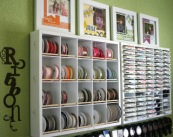
Create a functional space with an effective layout, this is where to locate what; your seating and storage to improve work flow and accessibility. Make the space your own with colour, pictures or your handmade crafts. Coordinate your favourite colours for your walls, storage solutions and furniture. Use colour to organize with a colour code storage plan.

CraftRoomOrganization  019Watermark    CraftRoomOrganization  010Watermark    CraftRoomOrganization  012

Craft Room by :- Sprinkled with Glitter 

Hope you enjoyed our article and as always  we wish you happy crafting in your craft cove!

Tameika

0

Make it Monday with Washi Tape

Happy Monday everyone.  It has been a rainy morning but don’t let the rain wash away your creativity and fun.  Today it is Make it Monday with…….WASHI TAPE. Before we look at some cool tutorials I would like to share some info with you about what is washi tape for those of you who may not know what it is. .

DSC_0913_copy_copy

The whole washi tape phenomenon started in 2006.  Washi Tape started in Japan but manufacturing has now spread throughout the world.  It is typically made from natural fibers, such as bamboo,rice or hemp, but most commonly from the bark of trees that are native to Japan — the mulberry, the mitsumata shrub or the gampi tree.

It is a paper tape that comes in pretty colors and patterns. It comes on a roll like regular sticky tape, and is often translucent. You can find it in 1/4″ widths up to 2 1/2 inches. Washi tape is similar to masking tape or blue painters’ tape in that it is easy to stick and restick in case you don’t get the placement perfect each time. This tape is versatile, fun and easy to use in many crafting projects. Washi Tape is available at Bead Cafe Arouca and Bead Cafe Craft and Hobby.

1

By: The Glamorous House Wife. View Tutorial 

2

DIY Washi Tape Laptop Keyboard by:- Her New Leaf. View Tutorial

3

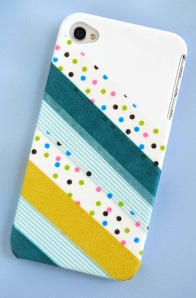
DIY Washi Tape Phone Cover by:- Zakka Life. View Tutorial

4

 Washi Tape Bunting & Cake Plate by:- Sugar and Cloth . View Tutorial

5

Wall Art by:- Living Locurto. View Tutorial

Make it Monday is brought to you by Bead Café Craft and Hobby. Join us every Monday for more ideas.

0

Wackyday 8 Craft and Jewellery Ideas

Some creative ideas we found online to inspire you 

washer monogram

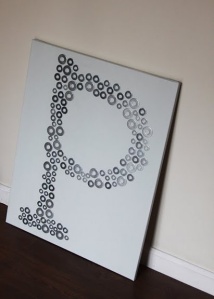
Washer Monogram Wall Art :- Someday Crafts

projects-8fc00803-c57e-493f-bb05-73664976cf91-06204504eb7849e788c98aab7f921805

Washer Pendants :- Two Peas in a Bucket

color-pencil-jewelry-1

Colour Pencil Ring :-  Ecouterre

maestre-kraken-2

Colour Pencil Sculpture inspired by jellyfish, octopuses and sea monsters:- Jennifer Maestre

button

Button Jewellery :- Nuada Accessories

Button_Pin_Art_Ran_Hwang1

Amazing Button Art :- Ran Hwang

xraylamp002

X-Ray Lamp Shade :- Sture Pallarp

unusual_jewelry

Unusual Jewellery resembles bones :- CAD by Temple University

0

Tip Tuesday – How to Sell your Jewelry

Hi crafty hands!

This a post I did some time ago for our first Bead Cafe Blog and I thought you might enjoy as we share tips and tricks every Tuesday. I have included additional information to the post.

How to sell your jewelry!

402136_10150619091065815_1488828706_n

Do you love making jewelry, are your friends always commenting on how good your jewelry looks and are your family members always borrowing your creations, sounds familiar? Maybe it is time to start selling your jewelry. Starting out is never easy especially if your hobby is a personal passion. The fear of criticism looms.  Here are a few strategies you can adopt to get your craft sold.

See what people have to say!

It is important to ascertain what people think about your work to help determine how well your product will do. There is no place like home to test your products.  So how do you get started?  You need to start spreading the word to family, friends, co-workers and community groups.  I do not mean just wait for them to say: ‘I like what you are wearing’ and somehow you mange to slip in:  ‘I made this’. You have to get active by sharing and showing. Sharing and showing is an action I coined as informing others that you are designing jewelry and you have pieces for sale and presenting your work. You may receive support as well as criticism but remember it is about learning, improving and developing your craft.

Where can you share and show your work:

  • Host a jewelry party with friends and family.
  • Lunch time or after work meet up (Check your company’s policy before engaging in any activity).
  • Partner with your community, credit union or other social networks. You can ask to display at the next AGM or church bazaar.   

Know your product?

You have made the leap and started sharing and showing and the questions start rolling: people want to know what the materials are, where do the materials come from, can it break or tarnish and all sorts of other questions.  You need to know your product, so it is important if you do not have the knowledge to spend some time learning about the products you use. There is much to learn and share, for example: beads are available in different sizes, shapes, types, colours and are made in different regions.  You need to be able to speak with passion and conviction; this is how you demonstrate and pitch to your customers that you love what you do and you know what you are talking about.  At Bead Cafe we host workshops to help you learn and create, visit www.beadcafett.com for details. You can also visit and subscribe to sites such as Beading Daily  or Art Jewelry Magazine

A Birth Stone Chart is useful. Some of your customers may be interested in a particular colour stone based on their birth month.

Brand it!

After fighting the nerves you are able to sell a piece or two, excitement builds and you design a few more pieces.  Although you just got started it is important early in the game to brand your products because referrals come quick and you want to establish an image. Decide on a name for your accessories line.  It may sound foolish in the beginning and you may think but I just got started. Think about it, if someone is showcasing your jewelry what do you want them to say?  Another thing is packaging; you can make cards at home to display your earrings or other accessories as well as make or purchase little bags or boxes for your customers.  On the cards you can print basic information about your product.  Remember if you are not there your product has to sell itself. You can keep it simple but make  sure you information is clear and have a clean look.  If graphics is not your thing, ask a friend or  check online, there are a few sites that offer free services such as Vistaprint, LogoMaker and Wix.

You can also make your own jewelry display stands with tree branches, picture frames, books, vases and more.

6 Distinctive jewelry Displays via The Frisky

These are just a few things you can do to start flexing your entrepreneurial muscle. Starting a business is no easy road but you can make a good start now.

If you have a topic you will like us explore email is at info@eatcraftplay.com .

Thank you always for stopping by.

Tameika (Crafty T)

6

Make it Monday – Scrapbooking

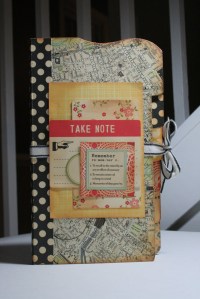
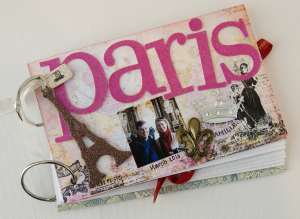
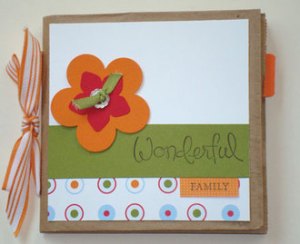
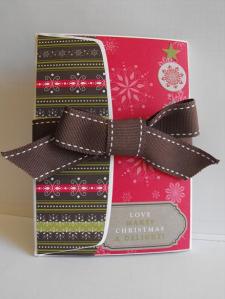
A Scrapbook is a keepsake, a decorated photo album that preserves the stories behind the photos (called journalling). A scrapbook can be made of pictures, stories and memorabilia such as tickets, certificates and letters. You can create a scrapbook for your family history or different events such as vacations, a baby’s first year, a holiday, birthday, anniversary and home improvement . Your scrapbook can become a treasure for many years, telling a story, preserving a memory and recording history.

A few materials you will need to start creating:

Card-stock, decorative papers, paper bags, glue, mod podge, washi tape, craft knife, ruler, punches and stamps are a few things you can use  in creating a scrapbook.

You can add embellishments to make your scrapbook POP! Stickers, glitter, paint, decals, ribbon, twine, rub-on transfers, letters, tags, quotes, eyelets, ribbons, fabric and stickers,  all of these you can add to your layouts, the list is endless let your imagination take over.There are many different techniques and products. It all depends on your own style. There is no wrong in this Hobby.

Here are a few Tutorials we found online.

1

Tutorial by : Burst of Creativity

4

Vacation themed Scrapbook Tutorial shared by: Polka Dot Chair

2

Paper bag  Scrapbook Tutorial shared by: Do Stamping

3

Scrapbook made with Envelopes

How cool is this, click on link to see tutorial by: Madonna Dunn

5

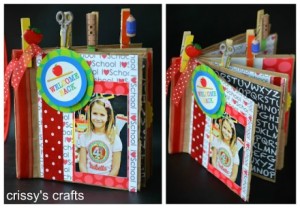
D.I.Y. Mini Scrapbook

Great one for the kids. Tutorial by: Crissys Crafts

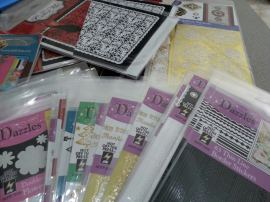
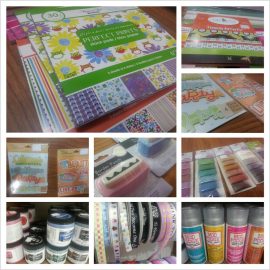
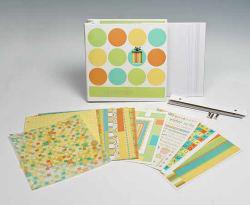
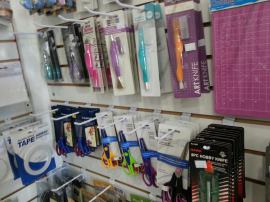
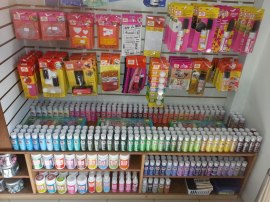
Here are a some of the supplies available for Scrapbooking at

Bead Cafe Craft & Hobby.

390125_431147883618346_2132463602_n 601194_466062946793506_895340235_n 63112_423869907679477_1997347406_n 270480_426932640706537_1935756554_n 20513_449878088411992_1095552003_n 380739_448634695202998_725416835_n

Make it Monday is brought to you by Bead Café Craft and Hobby. Join us every Monday for more ideas.

0

Wackyday. Food Crafts for Kids

Kids can be fussy at times when it comes to eating  their food. This is where you have to get crafty and make food fun again. You can also let them help you prepare them. It would be a great bonding exercise as well as they may be more inclined to eat something they helped create.  Here are a few food craft ideas that we found online and think the kids would just love to eat.

fun-apple-snacks-for-kids

Apples Race Cars. Which kid would’t want to eat these.  They are fun  and easy to make all you need are Apples, Grapes or String Cheese and Toothpicks. Check out the easy steps from Craft Jr.

pinwheel-flowers-kids-food-crafts

Pin wheel Flowers – This is a fun lunch. Jill from Meet the Dubiens came up with this idea because her kids won’t eat the sandwiches by themselves. As she anticipated it worked, well at least one of her kids ate them. You can give it a try, maybe your kids would love them. Click on like to see Tutorial.

1

Grilled Cheese and Banana “Ice Cream”  Sandwich. – Kitchen Fun with my three sons shared this awesome idea, Ice-cream for Lunch. It sounds unhealthy but that is the trick it’s actually wheat bread, cheese, bananas and a strawberry. A balanced lunch. Check out her Ice-cream for Breakfast as well.

CutestFood_com_bento_bob_esponja2_large1

Sponge Bob Sandwiches – These are spot on. Not sure if I want to eat him or play with him. These were created by Graphic designer and mom Heather Sitarzewski. She creates unique ‘bento’ lunch boxes for her son every day. She have created over 120 different bento lunch boxes. Check all here creations on her tumbler Lunch Box Awesome.

Post by:  Cake Artist Ronn